
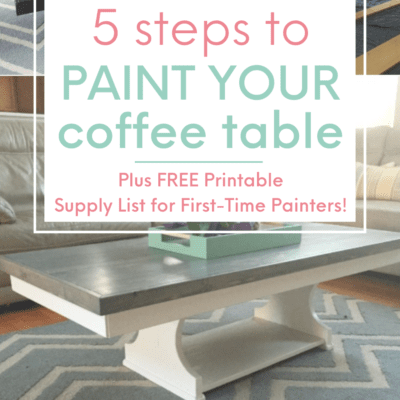
Looking to update some spaces in your home? Painting old furniture is one of the easiest ways to refresh a room. Plus, you might be surprised to know – painting furniture is actually pretty easy. Easier than you think (I’m sure!) and in this post, you’ll learn how to paint your coffee table in 5 easy steps. Even better news, I’ve used these same steps to paint the hutch, paint the kids’ beds, paint the kitchen table, paint the dining room table, paint the bathroom cabinets, and even to paint the piano! (And psst – I’m pretty sure they weren’t ALL real wood so this works pretty well on pretend wood and wood with shiny finishes too!)
so if you’ve been wondering things like:
- can I paint my furniture?
- what kind of paint do you use on old furniture?
- can I just paint over old furniture?
- do you have to sand old furniture before painting?
- can I paint my coffee table?
look no further…i’ve got you covered. let’s get started!
you know when you do something, and then you look back and you wonder why that seemed like such a good idea? like bangs? or braving the children’s museum on fall break? or that one time in college when…well, that’s kind of how i used to feel about my coffee table.
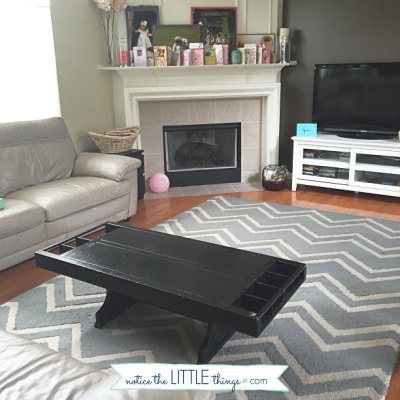
around 2003 i painted my coffee table black. i also painted almost all my other furniture pieces black. it seemed like the right thing to do at the time. dark furniture was in. the actual paint process i chose turned out to be very durable and long-lasting.
but the color? it didn’t really stand the test of time, style-wise.
fast forward ten years and i was tired of the color. it no longer fit my new farmhouse style (thank you fixer upper). not to mention the scratches and the marks on the top that despite my scrubbing, refused to disappear.
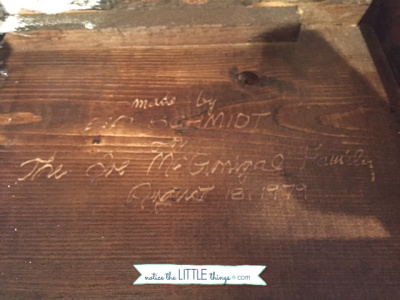
the coffee table needed a refresh. i could have purchased a new coffee table, but they’re not exactly cheap. plus, the coffee table was a wedding gift to my mom and dad, built specifically for them, with their name engraved underneath. i couldn’t exactly give it away.
does this sound like a piece of furniture in your house? maybe a coffee table, side table, or some other older piece? maybe you’re not ready to get rid of it, can’t afford a new one, or you’ve just been a LITTLE hesitant to try your hand at painting furniture?
NOT TO WORRY! this post will walk you through exactly how to paint your coffee table AND you can use this method to paint other furniture pieces too. by the end of this post, you will see just how easy it is to paint furniture. and if you’re interested in also designing a new top for your coffee table, i’m including a super easy, budget-friendly way to do that too!
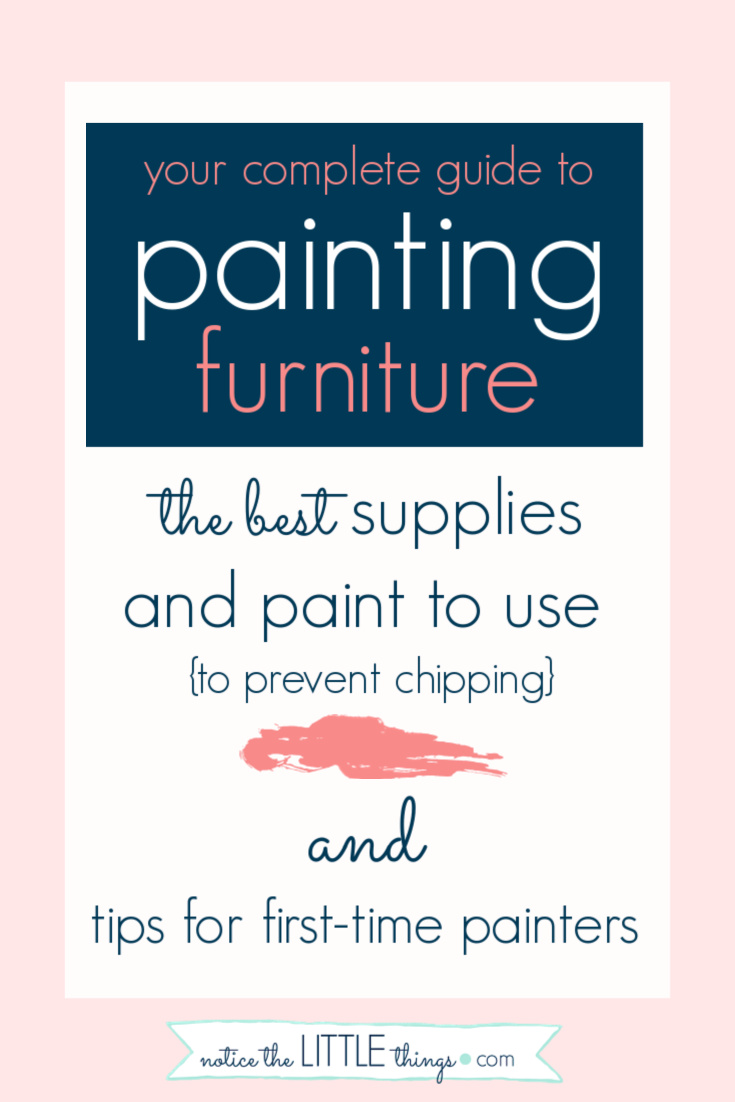
before you get started, if you’re really not sure what supplies to buy – from paint, to brushes, to finishes, and sanders – i’ve got you covered in this free guide to painting furniture.
when i first began painting, choosing the right painting supplies was the most intimidating part for me. there are so many things that bring me JOY about DIY, but getting started can be hard!
to help with that, i put together a list of all my favorite painting supplies. i use all of these exact products on my own painting projects. you can grab your copy here to help with your process.
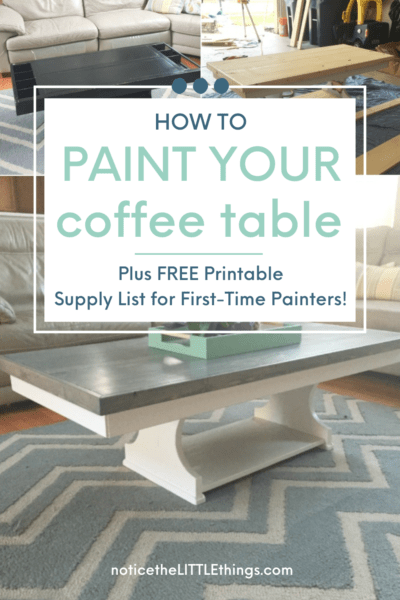
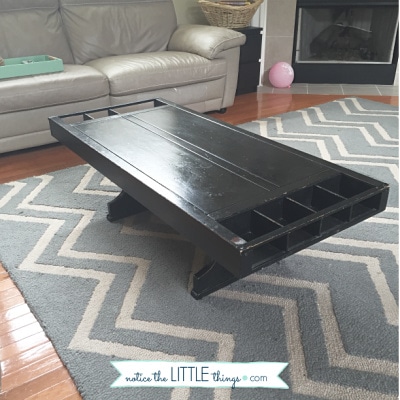
now that you have your supply list, let’s get started transforming your table from something that looks like this…
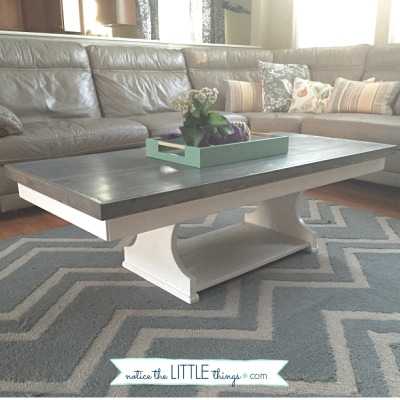
to something that looks more like this!
5 Easy Steps to Paint Your Coffee Table
below are the steps we took to transform our coffee table. if you are also looking for a budget-friendly way to create a new table top (in addition to painting your table), start at step 1. if you just want to use paint to transform your current coffee table, skip to step 2.
RELATED POST: How to Paint Your Dining Table
RELATED POST: How to Paint Your Kitchen Table

step 1 to paint your coffee table
build a new DIY tabletop (this step is optional)
when i redid our coffee table for the second time, i wanted to cover up the cut outs at each end because all they really did was catch crumbs.
when considering a new farmhouse style top for our coffee table, i first consulted with an actual table maker. he was very skilled and would have done it the “right” way, but he was also very expensive. all i wanted was a new pretty top nailed to our old top.
i knew this would be a budget-friendly and much faster way to transform our coffee table. thankfully, a friend of ours was on board to help.
our friend created a new top for our table from whitewood. whitewood can be found at your local hardware store and it is cheap, cheap, cheap. it takes a stain well and has held up amazingly for us over the past SEVEN years. i highly recommend whitewood when creating a new top for your table if you are looking to save money.
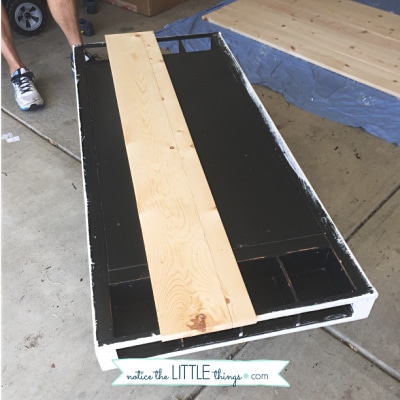
to make the DIY tabletop, we cut four, 7″ wide planks of whitewood to about 4″ longer than our actual coffee table {2″ of overage for each end}. we also cut a 2″ plank to lay in the very center of the 7″ planks. this gave the top some visual variety.
the whitewood we used was about 1″ thick. you could use thicker depending on the look you want. i also added a shelf on the bottom to hold a basket for blankets and magazines. extra storage is always a LITTLE thing.
we used 2″ planks of whitewood to frame out all four sides of the table. if you want a more rustic finish, you can skip this step and leave the edges unframed (like we did for our kitchen table here).
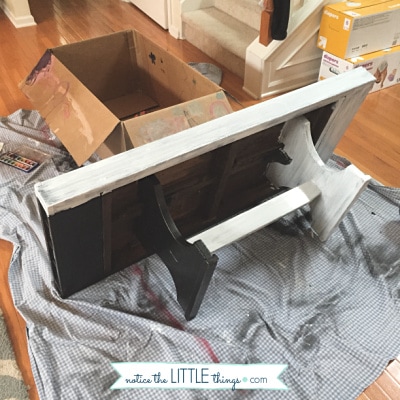
meanwhile, i wanted to stain the new tabletop a different color than the table base. so before we installed the new top, i primed the bottom part of the table white.
you will notice, i painted this table right in the middle of my family room. at the time, my kids were 2 and 4. so you might be wondering, how did i keep them occupied during projects? i let them paint too!
see that box behind the table? and those diaper boxes to the right? i save boxes sometimes to set next to to what i am painting. the kids use their washable watercolors on the boxes. large pieces of poster board work too. it takes me a LITTLE longer to paint with kids around but i promise it is possible!
![]()
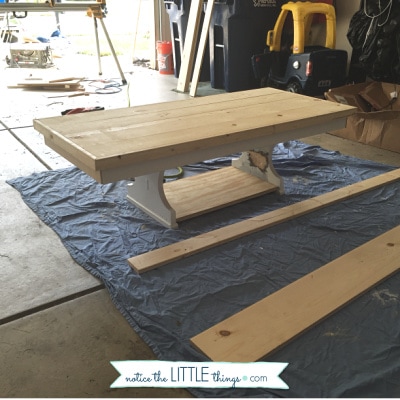
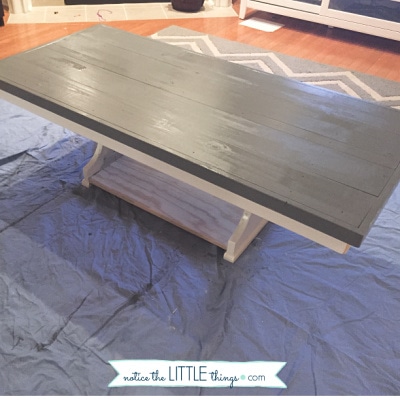
the farmhouse tabletop we achieved was exactly what i wanted! once the top was secure, we moved on to painting the rest, and staining the top…
step 2 to paint your coffee table
gather & purchase your supplies
to paint your coffee table so that it will not chip, you are going to want to prime, paint, and seal all the main surfaces. this is not hard, it just takes a few days.
you can purchase your brushes, primer (or pre-primer if you are staining), paint, polycrylic, and stain (if you are staining your new top) at your nearest hardware store.
 because i know it can be really overwhelming to keep track of all the details when you start a new project, i designed a super helpful FREE DIY Project Map. this map has room for you to take notes on your idea, your budget, supplies, steps, and timeline. if you want to grab this DIY Project Map for yourself, just click HERE. it is part of the popular Grateful Home Starter Kit so you’ll get the entire thing.
as you decide on your supplies and process, you can also grab my FREE DIY Furniture Painting Guide with all the exact supplies + paint that i use to make sure there is no chipping and my projects last!
step 3 to paint your coffee table
apply your primer
before priming, wipe down the piece you will be painting with a wet cloth to remove any dust or residue. when your piece is clean and dry, it is time to prime.
when it comes to painting furniture, using a primer is a must. i tested this out when i painted my hutch. i didn’t use a separate primer for that project. i tried to use a primer and paint in one. the bad news is, my hutch chips very easily, so i won’t try that again!
but the good news is…on my coffee table, even though i was going from black to white, i only needed one coat of primer. i also DO NOT sand first, as long as i am using a primer.
PRO TIP: you can get your primer tinted if you are painting a piece in a color other than white. it doesn’t cost extra at the store, but once it’s tinted, you can return the primer.
PRO TIP: your primer does not need to look perfect. with each new coat you do (primer + paint + paint), your brush strokes will get less and less noticeable and you will start to relax and see that you really cannot mess this up!
because i was staining the top of the table instead of painting it, i used a different product there called a pre-primer. this prepares your wood before you apply the stain and needs to be applied within 30 minutes of your stain. you can purchase this wherever you buy your paint and stain.
step 4 to paint your coffee table
apply your paint
after your primer dries, apply your paint. i use a combination of a brush and roller when i paint furniture. you can see which ones i use here in my FREE DIY Painting Furniture Guide.
i always cross my fingers that i might get the job done with just one coat of paint, but i usually need two (especially on something like this table where i went from black to white).
i like to work fast so i just wait a couple of hours between coats. if it looks streaky as you go, just keep painting. it will smooth itself out in the end. i promise!
if you are staining your new top, do that with within 30 minutes of applying your pre-primer. apply the stain with a rag or a brush. then use additional rags to rub the wood after you stain, almost like you are wiping the stain off. it will wipe off the excess, allowing the grains of your wood to show through.
the number of stain coats is up to you. you’ll want to apply the stain based on how dark you would like the final product. for my table, i only applied one coat.
PRO TIP: staining is much faster than painting, and also cheaper! if you are worried about time, choose to stain (but this only works on raw wood or wood that has been sanded or stripped allllllll the way down).
confused on what paints and stains to buy? want more tips for the process? access my favorite primers, pre-primers, paints, and stains here…
…and don’t forget you can also snag a cute FREE DIY Project Map to plan out your project right here.
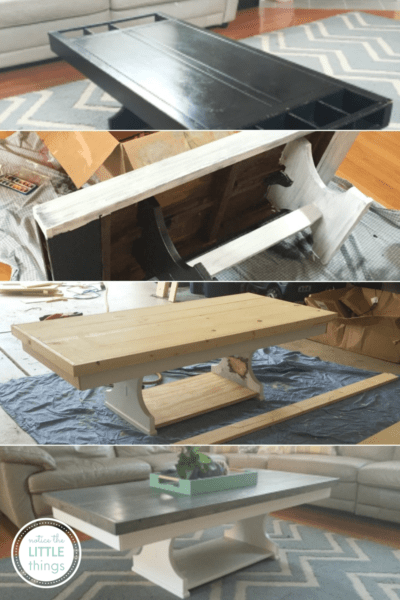
COLLAGE PIC
step 5 to paint your coffee table
distress your piece and apply your polycrylic
after your paint color dries, now is the time to distress your piece (if that is the look you want). i like the distressed look. plus, if your piece happens to take an extra hard hit or your son decides it is the perfect place to race his monster trucks, you won’t have to tell him no.
chances are, with this way to paint furniture, your paint will stand up to this wear and tear. but i prefer to distress and then completely let go of any worry.
i use a palm sander to distress my pieces. this part makes me nervous. every. single. time. i am always sure i will ruin my freshly painted piece. but a LITTLE sanding to the edges achieves that chippy look that is popular and durable.
you can also use sandpaper for this step if you don’t have a palm sander. sand paper is easier to control.
PRO TIP: i tend to stick to the edges and corners when i distress, but you can venture to the flat surfaces as well if you want.
PRO TIP: don’t start distressing right in the middle of your piece. give yourself some practice first. and don’t freak out after your first swipe of the sander. keep going. it will look fine once you’ve finished the piece and it is ALL sanded (not just one part).
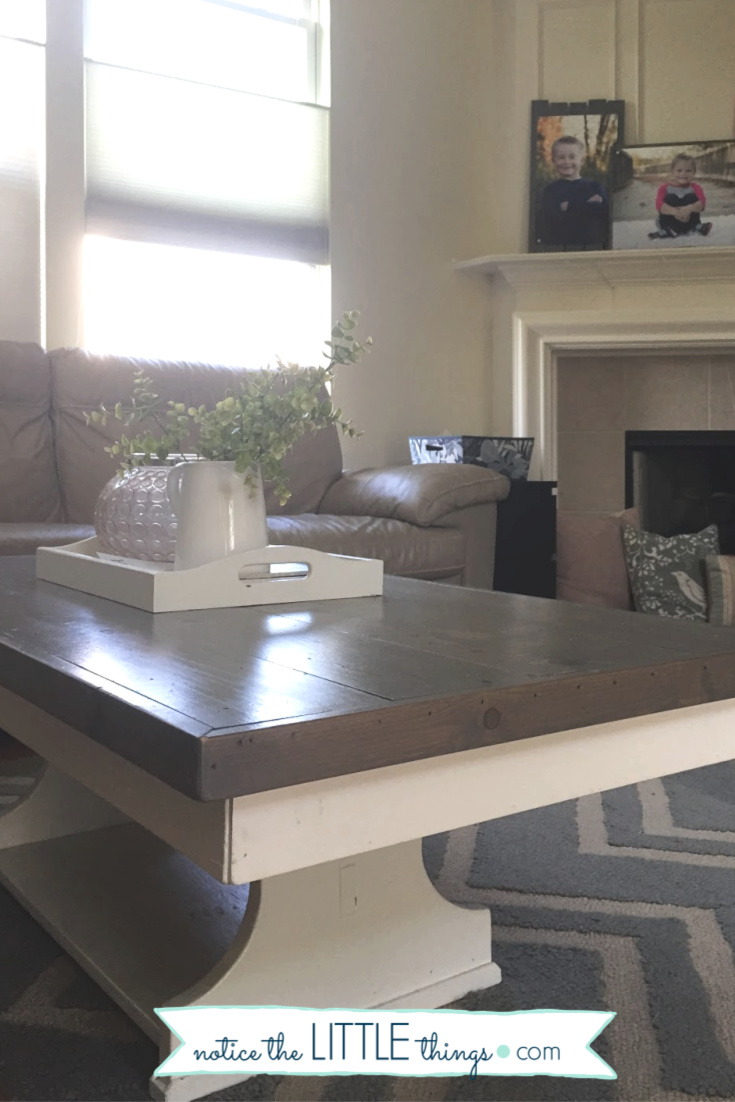
painting our coffee table made a huge difference in the look of our family room. no one could believe it was the same table. it was definitely the most budget-friendly option for our family. we liked it so much, we painted our kitchen table to match (for that process and before and after kitchen table pics click here).
i will tell you, after using this method COUNTLESS times on countless furniture painting projects, i don’t worry at all when the kids eat or play at our refinished coffee table.
i know this painting method stands up to the wear and tear of life!
OTHER POPULAR POSTS:
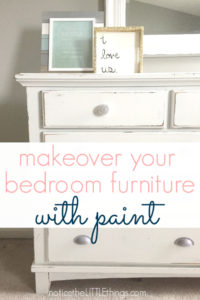
how to paint your bedroom furniture
how to hang a picture straight every time
{want to save this idea for later? click the red save box on the image below to pin this post. or follow notice the LITTLE things on pinterest here.}


The link does not take you to the list. Even after I signed up and subscribed I clicked on the link and got redirected to sign up page!
hi there! if you signed up, then you should get an email right away with a link and your password for the resource library. in the resource library, there is a DIY section. you will find the list there. let me know if you have any trouble.
:: erin ::