i used to think of renovations as long. messy. and out of my league. design a room, just how i want it? despite my love of hgtv, i truly never thought we would have the budget to renovate anything in our house.
i’ve always been happy {and still am!} with smaller diy projects and improvements around the house. painting furniture, building shelves, spray painting, organizing, stenciling walls, switching out rugs, and just general room decor changes.
{psst…do you have some furniture pieces that need an update? click here for a super easy and FREE guide to painting furniture and built-ins, including a list of supplies for first-time painters!}
until now, any actual renovation ideas always started with one day, and in the back of my mind i knew that day would probably never come.
- one day we will find a way to build extra storage in this house.
- one day i will hang cabinets instead of our open shelving so we can hide all of this.
- one day everyone’s shoes won’t be all over the floor.
- one day i will figure out a way for everyone to hang their coats and bags.
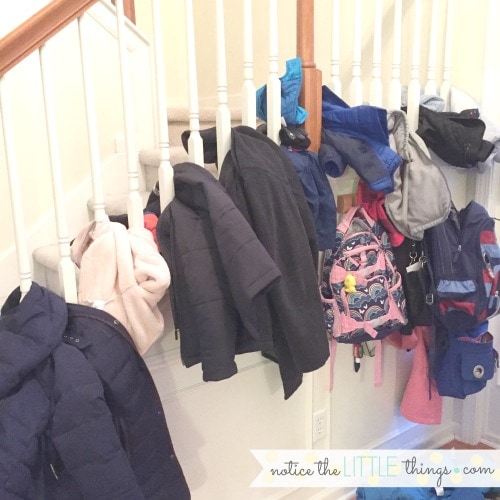
and then one day my husband said, why don’t you actually look into some of that, since you talk about it all the time. he probably also said that because our banister had started looking like this…
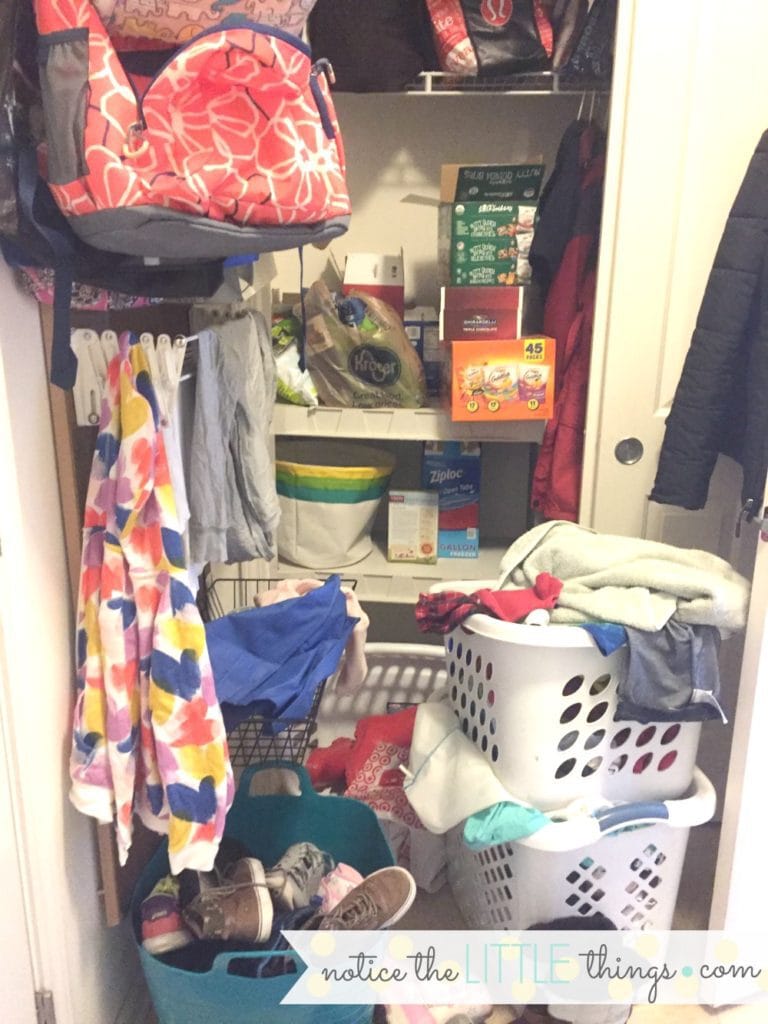
and our laundry room had taken to looking like this…
i am an organized person and STILL, i could not get a handle on these areas. so even though i was sure we couldn’t afford it, i decided it would be fun to at least entertain the idea of turning our laundry room into a mudroom. i called our friend and described what i was thinking. he named his price to help. he also estimated the cost for materials. i figured i could get most of the costs down even further. i planned to help with designing, painting, and price comparing everything. my husband signed off on the idea {what?!} and suddenly one day for our laundry room became now.
for complete details on how we completed this reno on a budget, it’s easiest to start at day one. for a snapshot of the areas where we saved the most, check out the bulleted list at the end of this post {with links to materials}.
now, for the final reveal. i feel slightly like a gameshow announcer right now but mostly i cannot wait to share these before and after pictures with you. i love before and after pictures. especially of everyday people making big changes. don’t be fooled. it might have taken me nine months to write about it, but the actual reno was just 35 days…
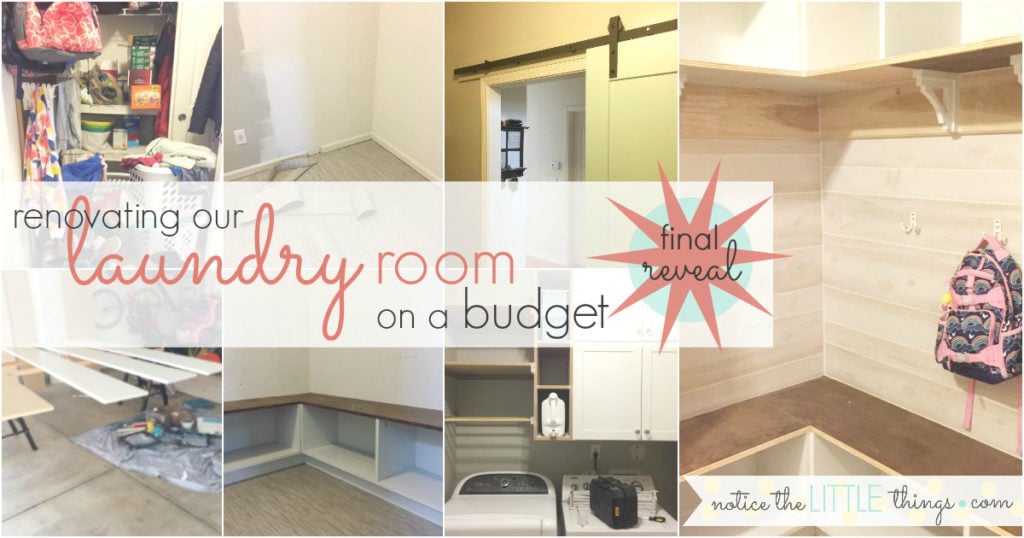
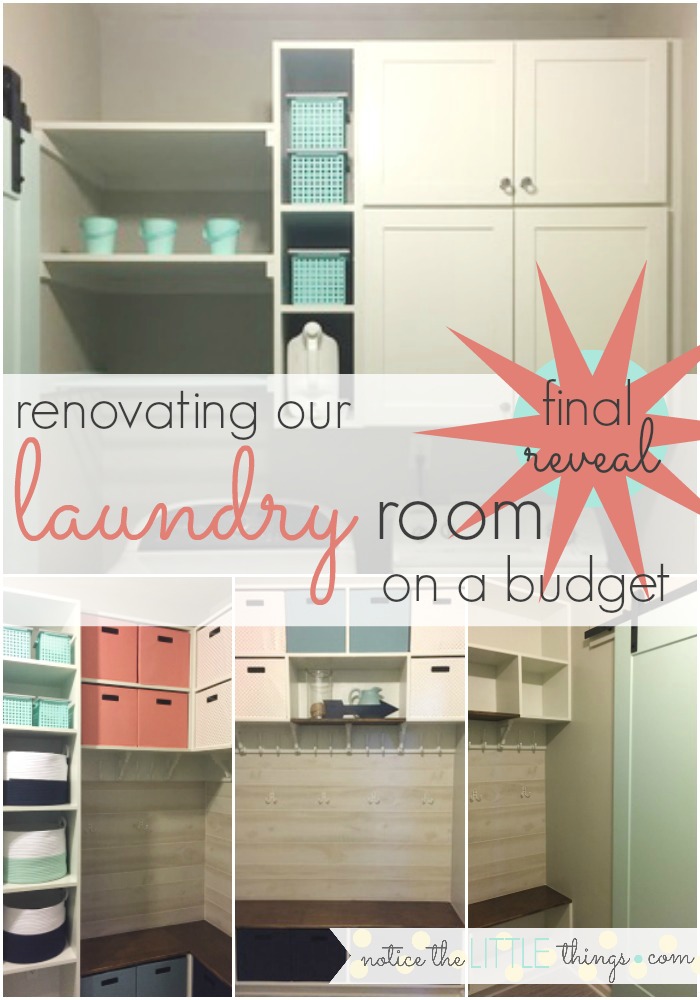
budget-friendly laundry room renovation
final reveal
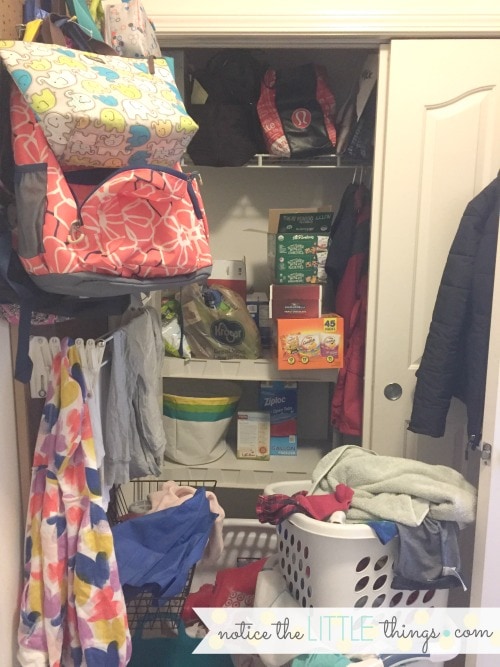
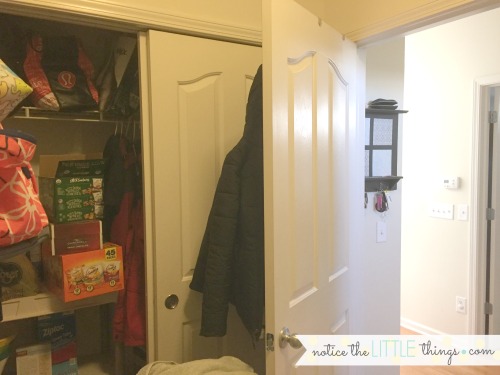
the closet, again, before we cleared it out. seriously. what isn’t in this closet? snacks, dirty laundry, drying laundry, shoes, coats, backpacks. and who knows what is underneath all that?? it’s always amazing how quickly this clutter can build up. THIS caused me to panic every time i left or entered the house. i cannot tell you how many times i tried to organize this closet by purging, buying bins, rearranging. nothing worked. it always ended up looking like this.
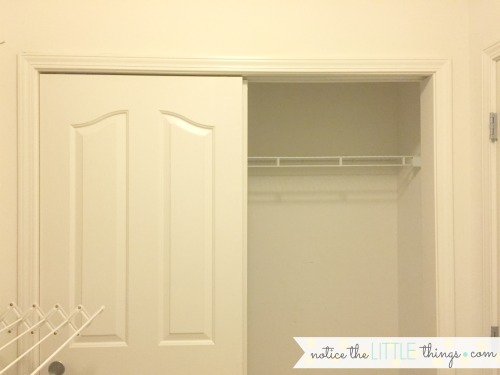
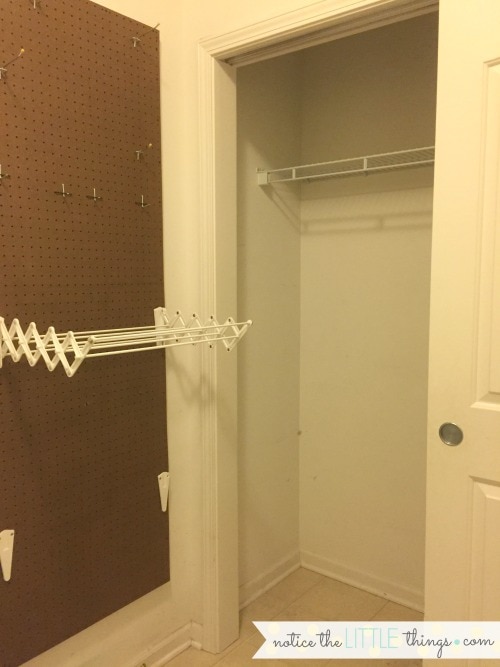
the closet minus all the stuff. it doesn’t look so bad when it is all cleared out like this. it almost made me want to keep it! but as our only closet on the first floor, it just was not functional for all the things we needed it to be.
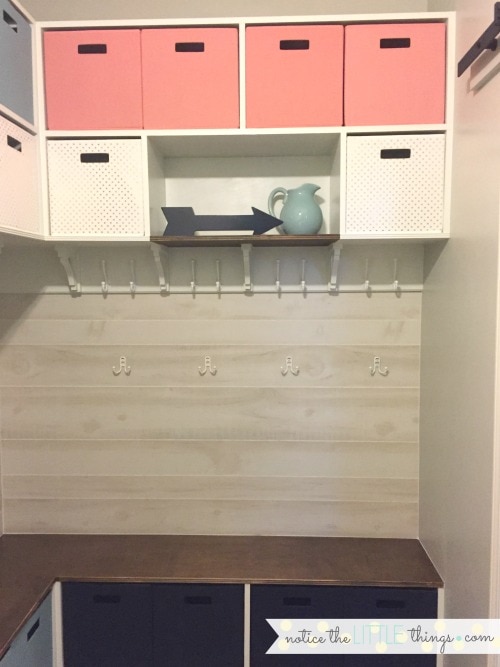
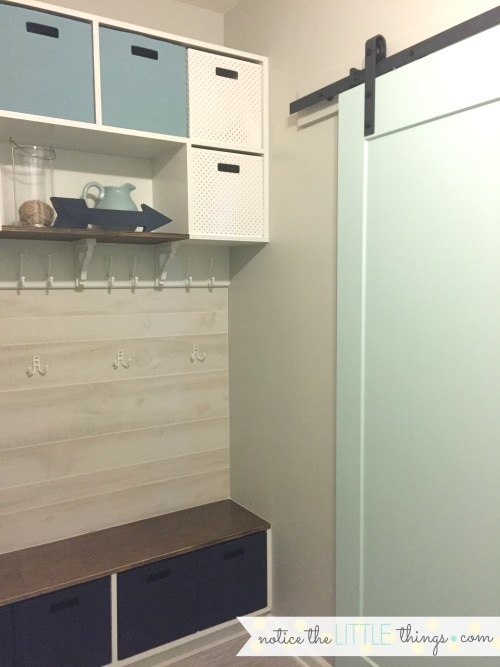
ta da! no more closet! instead, accessible storage and my favorite…a place for everything! we now use the upper storage for things like hats, gloves, beach towels, reusable bags, and lunch boxes {and some of them are still empty!}. in the middle is my fun shelf to decorate {with a couple purchases waiting to be arranged}. four sets of high and low hooks for the four people in our family {baby on the way has the hooks on the adjacent wall}. and below each set of hooks is a corresponding shoe bin for each person’s shoes and a bench for sitting.
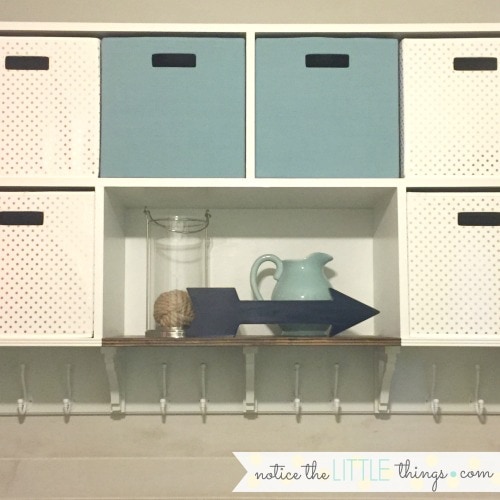
a close up of the upper shelves and hooks. soooo many hooks!!!
3 doors pictured + 1 garage door behind this picture = 4 doors all opening IN to this small area. and bad lighting. eek! to do anything or put anything away, you had to move a door. hence the reason no-one put anything away. let the reno begin!
i mean. can you even believe this difference? and i promise you it looks like we spent more than we did! this sliding barn door, aside from being aqua {swoon!}, is such a space saver!
doors again. and more bad lighting. the peg board was left by the last owners and the extendable clothes rack was my attempt at creating a place to hang clothes to dry. it was a good effort, but SO not functional for this space.
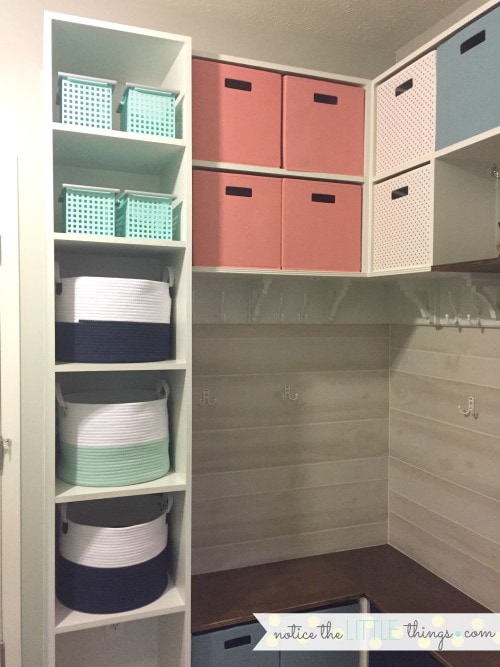
again. can you believe the transformation. i truly never ever thought we could make this happen. now we have functional space and endless storage! here you can see more hooks, a shoe bin for baby #3 {due in october}, and all my favorite colors. the other lower bin holds school snacks for the kids {pantry overflow}. happy dance for storage that works!
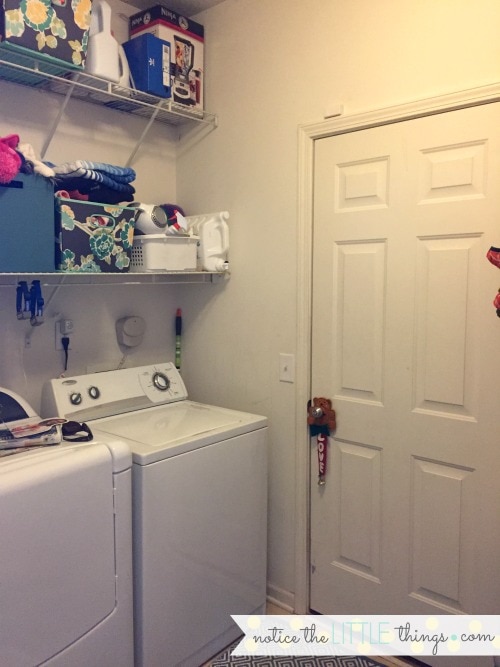
a full length view of the ceiling-high clutter on the opposite wall, and our mismatched washer and dryer. those were not part of the reno. do you see two electric fence dog collars hanging from the bottom shelf? we don’t even own a dog! but still there they hung from the previous home owner. why?! and that doorknob decor? no kidding, is from a school fundraiser i did in second grade. i am not really a saver of things, but i found it in my mom’s old christmas decor and it makes me smile.
a full length view, complete with a view of the rug i found for just $30 at homegoods. it had all the right colors and was the perfect large size. for $30! they also had a matching one for my back sliding door. sometimes, things just work out.
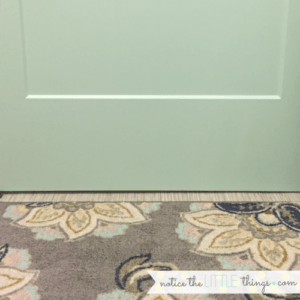
a close up of the rug pattern next to the aqua door and new-very-inexpensive-but-perfectly-coordinated flooring. i think the floral offsets the boxy feel of the cubbies nicely and gives us something warmer to step on. smile.
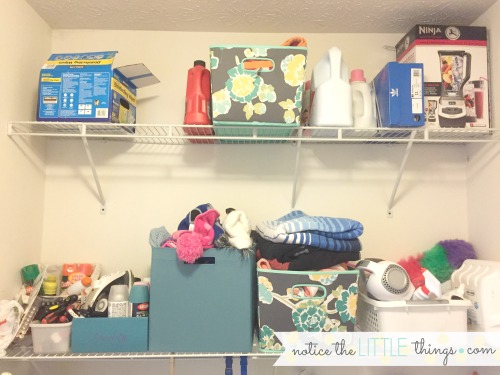
close up evidence of the overhead clutter that i tried so hard to control. despite any and all attempts at lasting organization, these shelves always ended up looking like this. partly because the shelves were hard to reach and partly because this room just has to hold our real life stuff. no surprise, some of that stuff is not pretty on open shelving.
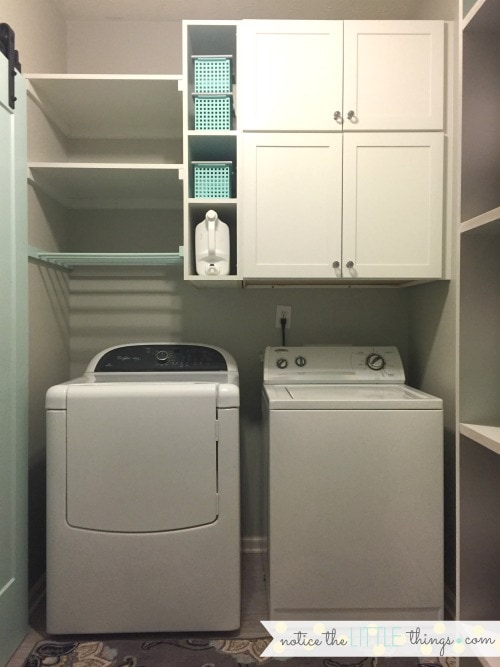
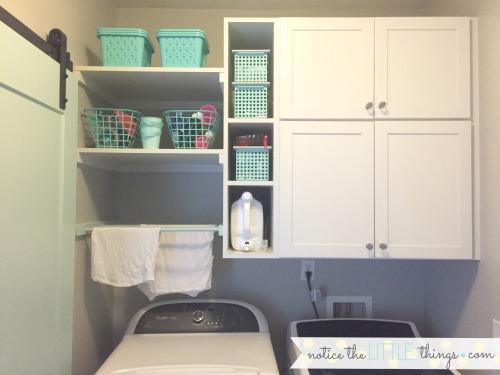
aqua. and white. and cabinets with doors to hide things that are meant to be in laundry rooms but do not need to be out to stare at all the time. what’s in the cabinets? who cares because you can’t see it! but seriously, the lower cabinet holds pantry overflow from the kitchen {think big costco boxes of goldfish}. the upper cabinet holds cleaning supplies. and if you spy a new washing machine, that’s because two days after this room was complete, our old dinosaur washing machine started flooding the new space and leaking down into the basement. real life struggles! we had to buy a new one, but they no longer sell the model that matches our dryer. sooooo. mismatched washer and dryer it is! i cannot complain. even mismatched looks good in this new laundry room!
let’s face it. a disorganized laundry room is obviously a first world problem. reno or not, i was always happy for a place to drop all our things as we entered and exited the house. but THIS just makes a lot of things easier. shoe storage. coat storage, winter wear storage. summer gear storage. food storage. backpack storage. and a place to do laundry with room to actually stand and do it.
i am often writing that the easiest way for anyone to stay organized is to have a place for everything. this doesn’t happen all at once, and sometimes it is something you have to save up for. that’s why you just tackle projects one at a time. does my whole house look like this? no. not even close. but one by one i’ve made small and affordable organizational changes. and LITTLE by LITTLE our living space is becoming clutter free.
we are on a budget around here, just like everyone else. i have an editing job that allows me to work from home and i enjoy tutoring after school. but my main job is raising our growing family. my husband works tirelessly to support us. we don’t have a lot of extra funds lying around for big renovations and big changes.
this laundry room helped me learn that there are always ways to cut costs down to something that is reasonable for your family. whether you’ve been putting of a similar project for budget, timing, or just plain old nervous reasons, i hope this is proof you can accomplish big things in a small space on a small budget.
budget-friendly laundry room
largest areas of savings
- using a friend to do the construction…$1,000 savings
- getting multiple quotes for demo and clean up work…$850 savings
- using MDF instead of solid wood…$200 savings
- using paint plus primer instead of buying primer and paint separately…$100 savings
- using valspar reserve instead of valspar signature…$30 savings
- buying the track and barn door separately instead of as a kit…$70 savings
- getting the cabinets from our friend’s storeroom…$250 savings
- painting the laundry room walls myself…$140 savings
- using left over paint from our 4th bedroom for the wall color…$35 savings
- designing and painting the built-ins myself…$500 savings

{psst…painting built-ins {or any kind of furniture for that matter} can be a LITTLE intimidating. i used to feel the same way. especially about what supplies to buy. over the years, i’ve painted kitchen tables, coffee tables, night tables, mirrors, dressers, chairs, bookcases, beds, and more.
painting built-ins was really no different. i have a fool-proof, chip-proof painting method that comes from years of trial and error. after many phone calls from friends asking to remind them what is the best kind of paint to use on their furniture piece, i finally compiled all my favorite tips and supplies into one helpful guide. feel free to make your life easier and grab your copy here.}
- going with pretend shiplap {paneling} instead of actual shiplap…$200 savings
- using fiberglass vinyl flooring instead of laminate or tile…$480 savings
- using more basic white hooks instead of something fancier…$40 savings
- choosing smaller and less ornate brackets {similar found here}…$100 savings
TOTAL PROJECT SAVINGS: $3,995
for more before and after pictures and to look back at our entire budget-friendly laundry room renovation journey, start here.
looking to organize some more spaces in your home? here is how i organized my small desk space, got rid of our paper clutter, found a place for our school papers, and tackled our cabinets…all on a super strict budget!
interested in reading more at notice the LITTLE things?
join in noticing 10 LITTLE things in every kind of day and come along on my diy, parenting, and organizing adventures. click here to subscribe and receive access to my favorite FREE printables.
{want to save this idea for later? click the red save box on the image below to pin this post. or follow notice the LITTLE things on pinterest here.}








Wow what a great space! I love the color scheme and eespeciallh the aqua barn door!
thank you! we are really happy we went ahead with it. i agree, the barn door is pretty fun. i keep looking around my house like where else can i put one of those! so nice to hear from you!
:: erin ::
Oh my gosh I could not love this post or your laundry room or the way you write any more! Everything about this is fantastic, and I am OBSESSED with your savings list at the end. SO helpful as we begin our garage with a side mudroom project! I’ll probably be bothering you a ton in the coming month with suggestions and recommendations. Sorry in advance!
Good work, my friend!
oh yay! hope it helps with the garage. don’t be afraid to go to lowes and ask a million questions! bother me any time. happy to help!
:: erin ::
Erin, I have been following this renovation for months now and i was SO excited to see the final reveal was FINALLY up!!! I love it!! It is absolutely beautiful, and such a well done project. You give me hope that renovations and organization projects can be affordable! Thanks so much for sharing!
than you annie! so sweet of you. yes! yes! yes! you can do so many projects on a strict budget. almost ALL of my furniture is hand me down and i rarely splurge on anything else around here. as long as you’re willing to wait a bit for the sales and do some of the work yourself you can do anything for less. my next post is going to be on things you can spray paint. cheapest way to give something a new look! speaking of projects…can’t wait to hear about your wedding details! if there is anything i can do from afar – look for sales, research ways to save, you name it…email or text!!
:: erin ::
Absolutely functional,, place for everything.. beautiful colours It is a project well worth waiting for ..you did an amazing job and I totally love doing laundry you can ask Denise it’s my favourite thing to do and I sure would love to do it in there…great job!!!
well. i love doing laundry a LITTLE bit more with this new laundry room. the hardest part for me is not getting it clean, it’s getting it folded and hung! thank you for your kind words about our new space. a reno was definitely a learning experience and we are really happy with the results! i heard you are coming for christmas?!?! so exciting!
erin